In the article “How to Securely Delete a File” we saw that using Windows to delete a file is not the way to do so securely. To completely delete a file you have to overwrite it multiple times with different patterns; something Windows has no capability to do. In this article we discuss how to use the free program File Shredder to securely delete files. [Click on pictures to expand them.]
File Shredder is a program that allows you to securely shred one or multiple files using algorithms up to the Guttmann 35-overwrite algorithm. The program will also overwrite and clear all of the free space on a disk and, if you wish, will install a link to the program into the right click context menu for Windows Explorer so that if you are in Explorer and right click on a file you will have an option to shred it or mark it for later shredding.
Installing File Shredder is easy. It comes with a Windows installer that operates much like any other Windows installer. The program installs into the C:\Program Files\File Shredder\ directory by default but you can change that if you need to.
Once installed, to start the program you need only double click on the program icon and you see the main screen…
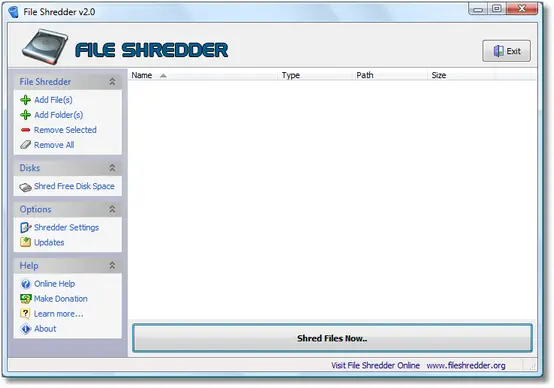
The left menu controls the actions of the program. You have links for adding files or folders or removing them from the file list in the right side of the screen. Below those is a link to shred free disk space and below that is a link for Shredder Settings. That’s the first one you want to take so you can make the program behave as you wish…
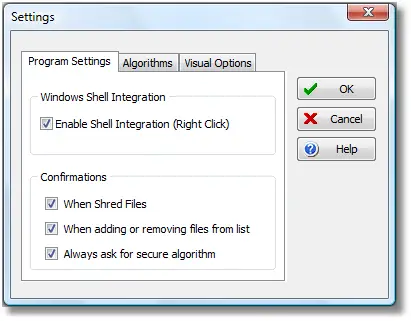
If you want to have the File Shredder option appear in the right click context menu for Windows Explorer make certain the first box is checked. Because file shredding completely removes a file from your system you should also make certain the confirmations are all checked. If you were to make a mistake without confirmation the program would execute your command and if it’s a file you really wanted to keep they you’d have to restore from backups (you do keep backups don’t you!?). With confirmations at least you will have a second chance to bail out before making a mistake.
The Algorithms tab in the Settings dialog allows you to select the exact method you want used to overwrite and “shred” files…
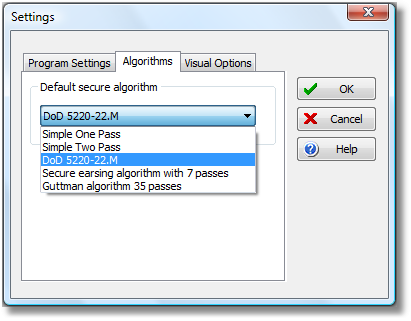
The DoD 5220-22.M standard of three passes over the file with specific patterns is the default selection. Unless you have very sensitive files to delete this will likely do. To recover anything at this level would require very advanced techniques and may not even be possible then. It’s also the fastest secure algorithm in the options. The other two to consider would be the 7 and 35-pass algorithms. These certainly will be more secure than the DoD but will take that much longer to execute. Your choice however. Use what you feel comfortable with.
The Visual Options tab presents options on how the program looks when started…

These should be pretty obvious selections. You likely want the program to be visible when you choose to run it and does anybody really want a small utility program to fill the entire screen when it starts???
After shredding individual files you might want to clear the free space on your hard disk. Why? Because the hard disk is divided into sectors of a given length and if a file does not have enough data to fill the last sector written to then whatever was in that sector stays on the disk and could be accessible to any utility that reads the disk byte by byte. If it just happens to be part of a previous version of your password file that data could be useful to someone. The link to clear free space is just above the Settings link in the left menu. When clicked you see the drives on your system…
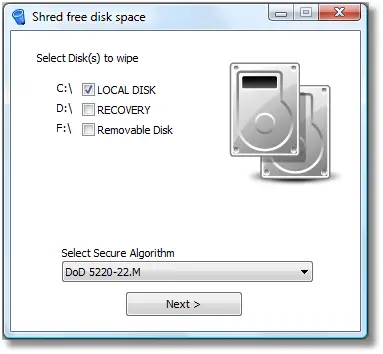
Check the one(s) you want to clear the free space on and then select the algorithm to be used. As before, the DoD is probably good enough for most uses unless you are really paranoid or have things that just should not see the light of day on your system. When done setting things up, click on the Next button…
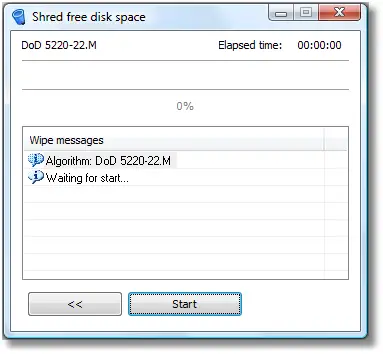
The next screen provides some summary information with a Start button. Once the Start button is clicked the free space shredding begins. This can take significant time to complete depending on the size of your disk, the number of files on it, and a variety of other factors specific to each computer system. Do not start this process if you can’t let the computer run. The program will give you an option to abort the process if you need to but even that takes a bit of time while the program cleans up after itself before stopping the process.
Now that things are set up, let’s see the program in action. CKnow set up a test machine and ran the program against several copies of the same 2.4 megabyte file using different algorithms and captured the results in a Flash video. The results can be viewed by clicking on the graphic below…
Well, not quite yet. Still have to edit the video.
[Coming Soon]
Finally, File Shredder will add a shortcut to the right click context menu for Windows Explorer if you told it to do so in the settings above. This gives you the option of having quick access to the program from Explorer…
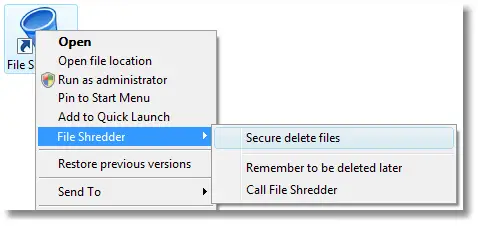
You can see the result in the graphic above where CKnow right clicked on the File Shredder icon and then selected that option. You have the option to immediately shred the file in question using the defaults presently set in the program, mark the file for later shredding, or opening the program itself with the file selected.
That’s File Shredder in a nutshell. Interested in the program? Go to their page and read more or download![]() .
.
This article is part of a series about secure file deletion. The others in the series include: “How to Securely Delete a File” and “How to Use Moo0 FileShredder to Permanently Delete Files“. Related would be the article “What Files to Delete to Maintain Your Privacy [Coming Soon].”
[Added 19 August 2018] The article How to Securely Erase a Hard Drive or Solid State Drive![]() goes into this same topic and introduces ways to erase disks on a Macintosh as well as solid state drives (which require different techniques to erase the disk(s)).
goes into this same topic and introduces ways to erase disks on a Macintosh as well as solid state drives (which require different techniques to erase the disk(s)).